
Like most photographers, I want to get out and shoot every day. Even if the weather isn’t perfect. Therefore, this means shooting summer landscape photographs.
The general agreement in landscape photography is that it should only be taken between autumn and spring when the weather is more dramatic. Summer landscape photography can mean harsh daytime sunlight and a less dramatic sky. However, there are many benefits to shooting in the summer, from late sunsets to warmer weather.
I’m a big believer in pushing yourself to be more creative and summer photography is a great way to practice this. So here is my how-to guide for summer landscape photography.
What you’ll need
With summer just around the corner and before you head out on your next summer landscape photo shoot, you’ll need to remember a few basic items:
– Tripod: An essential item for any landscape photographer. Even though during the day the light will allow for quick shutter speeds, owning a tripod will let you capture HDR images and help during sunset shoots.
– Sunrise/Sunset app: Make sure you download a sunset/sunrise app, for example, Photopills, as this will force you to arrive early to your location.
– Polarise filter: As I explain later if you want to achieve high-contrast summer images I suggest investing in a polarising filter.
– Location Notebook: Before you leave, make sure you have scouted the right location and if you find one while you’re out don’t forget to write it down.
– Be prepared for the sun: Take lots of water and sun cream. Being out in the sun for extended periods of time can cause you to dehydrate.
– Wide-angle lens: This isn’t a must, but if you want to capture vast areas of the blue sky then I recommend you take your wide-angle lens.
Capturing summer landscapes means you will encounter some problems. For example boring skies, too much green foliage and too many tourists on the beach.
Below are the techniques I use during the summer months to create stunning landscape photographs.
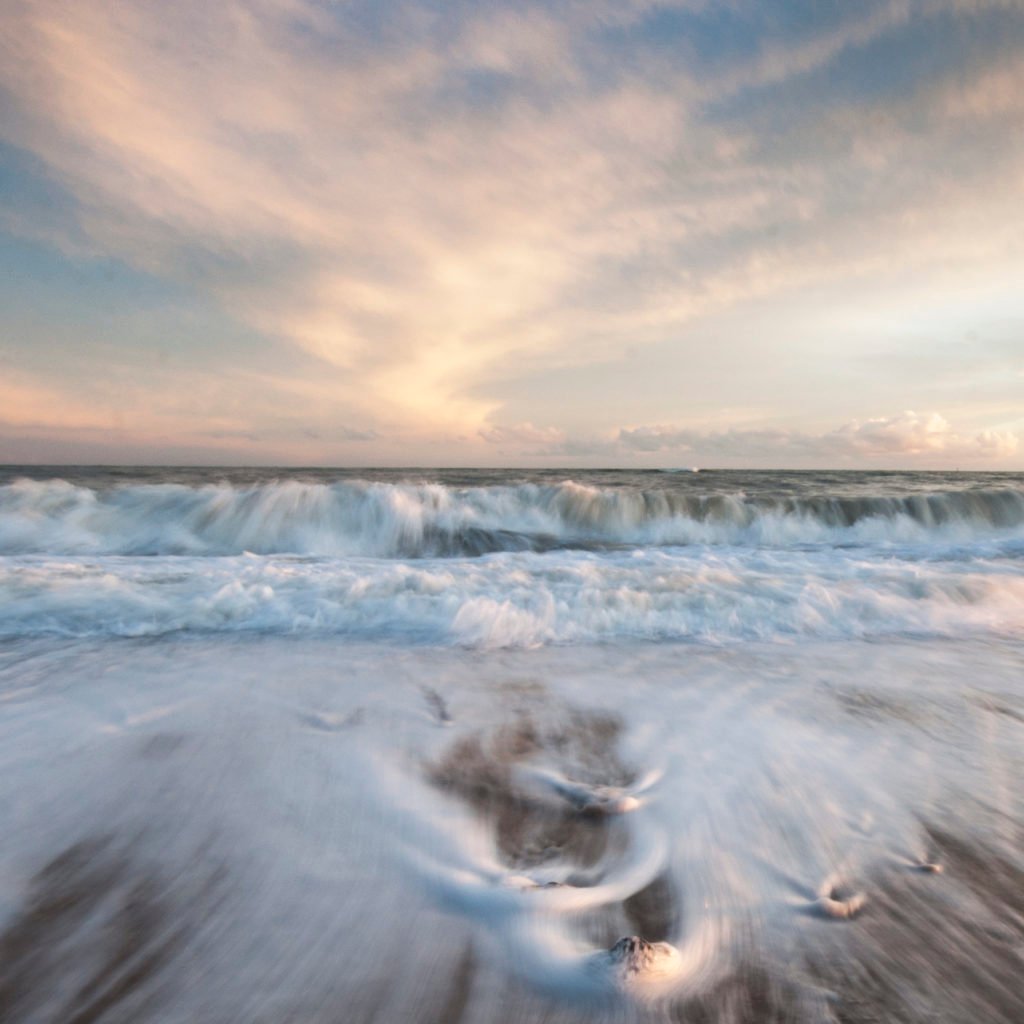
1. Find Silhouettes
Silhouettes are the perfect way to build drama in your scene and create a story as there are parts of the image that the audience would have to imagine themselves.
These images can use people, buildings or even animals in the scene and when shot correctly there should be a dark figure creating a smooth outline in front of a bright background.
The simplest way to photograph silhouettes is to use the setting sun as the background, this should give a strong silhouette as the warm colours of the sun fill the background.
My tip is to use one subject as the silhouette as this creates a less chaotic scene and then use manual focus as your DSLR’s sensor might struggle to autofocus.

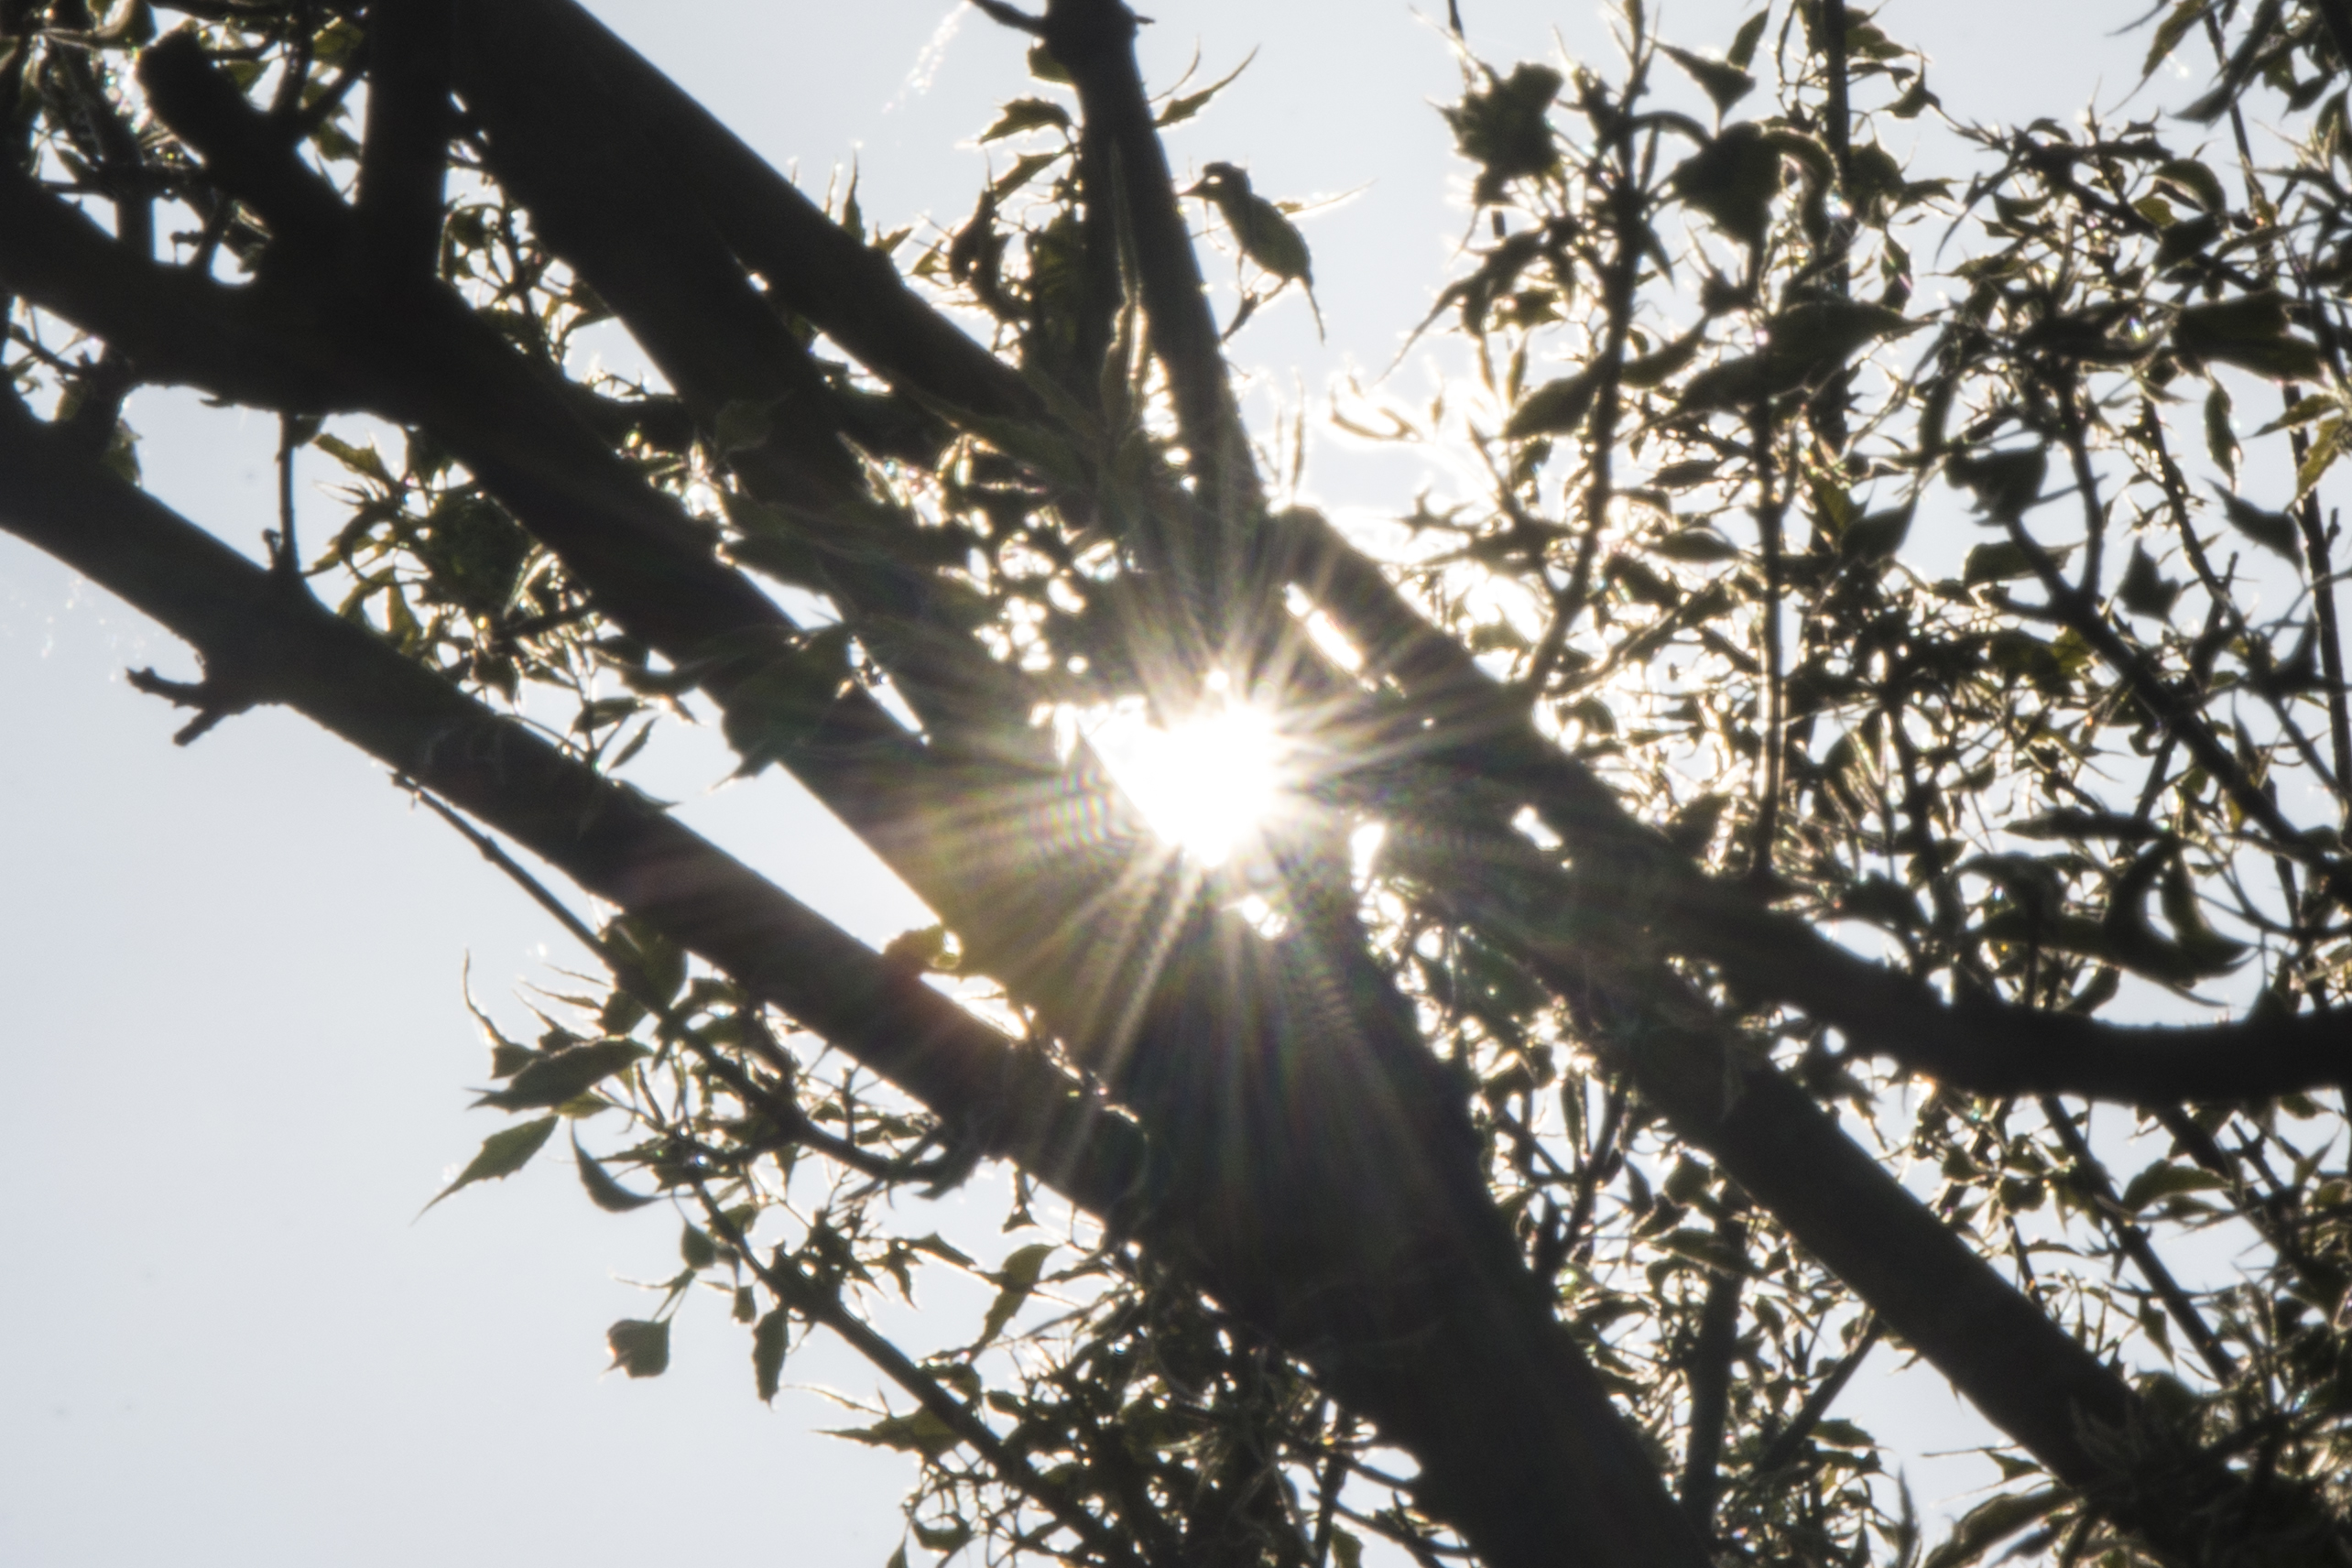
2. Create Lens Flare
Shooting into the sun can create sun flares, frequently these flares are not wanted and the photographer makes an effort to avoid them. However, if you want to get creative with your summer photographs try and break these rules!
Start by shooting into the sun, this allows the sun’s rays to reflect through your lens creating these beautiful flares. However, ignoring what I mentioned earlier with silhouette photographs, you want to meter for your subject and have the sun slightly off centre instead of directly behind them. Otherwise, you’ll have another silhouette photograph.
When I photograph for lens flare I use aperture priority mode (Av, or A on your camera dial) this way you can set the aperture you desire while the camera automatically sets the shutter speed accordingly. Plus, use the screen live mode instead of looking through the viewfinder so you don’t look into the sun.
Now to capture the best sun flare you’ll need a small aperture of around f/16-f/20 as this creates a larger and more defined flare than using a large aperture of f/4 which produces a rounder, smaller flare.

3. Use a Polarised Filter
One of the most essential tools any landscape photographer should have is a polarising filter. These filters instantly improve the contrast and saturation to your images and photographers say it’s the only filter you can’t edit afterwards. This is because the filter reduces reflections and haze in a scene which cannot be fully imitated in Photoshop. Haze is a real problem during the summer so using a polarised filter assists in reducing this.
Not only that, but polarised filters can improve the appearance of the colours within rainbows. Once you rotate the filter you’ll be able to witness what your eye sees rather than what a normal camera would.
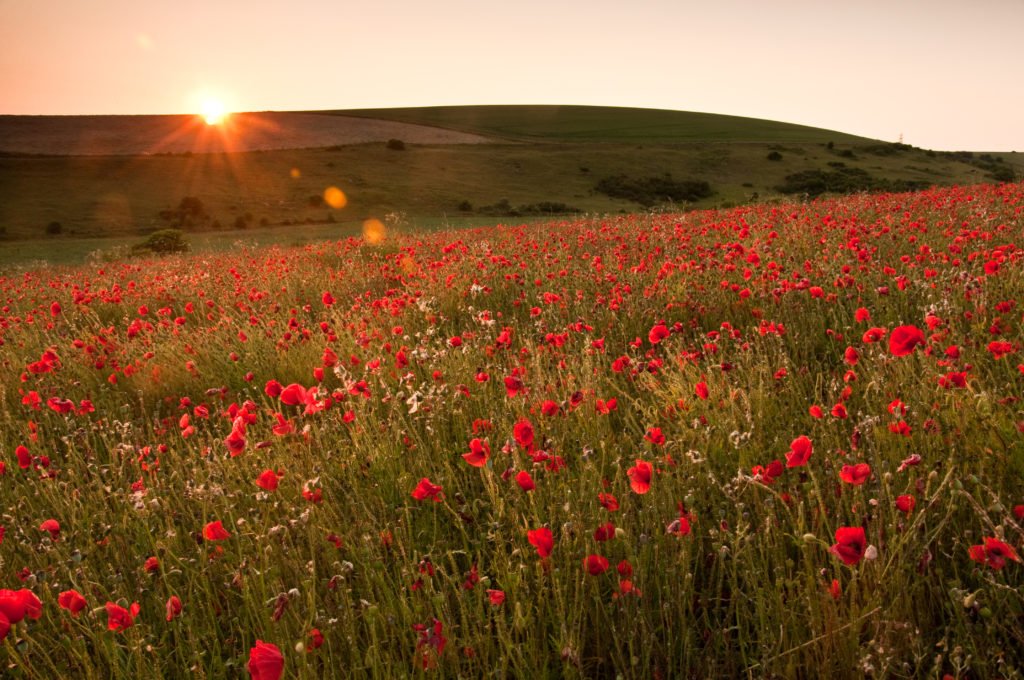
4. Take Advantage of the Flowers
When summers here you need to head out and find your flowers, which will be blooming everywhere. However, without a massive amount of effort, you can capture stunning summer photographs if you include a field or even one flower in your scene.
You can try taking images early in the morning as you watch the due form on the petals, or wait until sunset where you can photograph a field of flowers with the sun setting behind them.
When photographing a single flower it is important to remember to use a wide aperture, blurring out the background, making the flower the focal point.
5. Change your Location
During the winter and autumn months, I’m sure you’re used to photographing the same location. Whether that’s because the sun sets in the right place or you are guaranteed frost covered trees. During the summer months, however, this is likely to change, so scouting out a new location is a must!
For me, landscape photography is also a journey and a way to tell a story, so finding a new location will definitely spark your creativity and create a new chapter in your photography journey.
You’ll have to keep in mind a number of factors during the summer months that will help you chose the right location. Photographers use apps like Sun Scout to help work out where the sun will set in that particular month. Plus, where trees are usually bare, in the summer months there will be copious amounts of green foliage on the trees adding a warm tone to your image.
When researching your next location, keep an eye out for lavender farms, oilseed rape fields, wheat fields, barley and sunflowers. With a blue sky, you can achieve a large contrast between the ground and the sky.
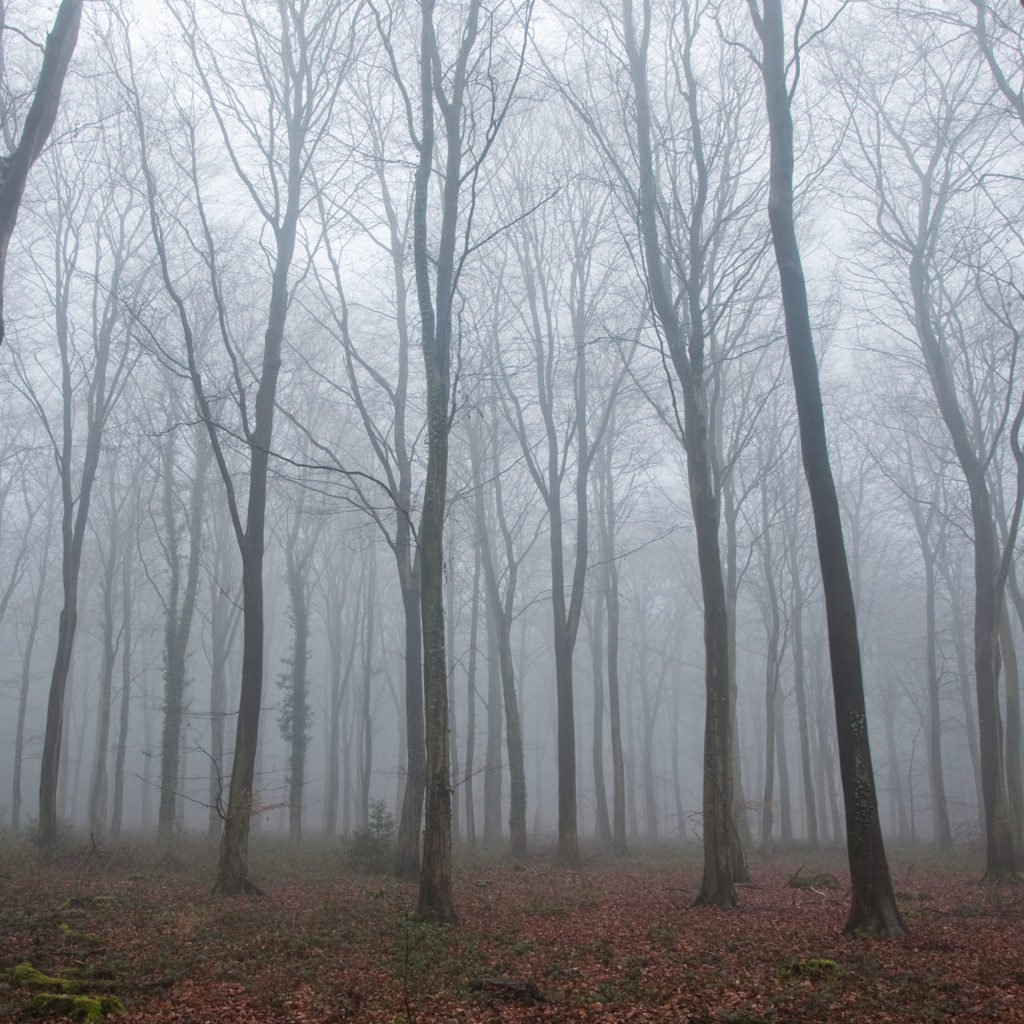
6. Make use of Cloudy Days
Here in the UK summer doesn’t always mean sun, the vast majority of the time you can expect cloud and low lying fog to form. Most photographers can be discouraged from venturing out as the skies aren’t as dramatic as the winter months. Obviously, you won’t get that warm glow you’d expect from summer photography or the perfect summer sunset but if you find a local woodland and be creative you can take advantage of the dull sky.
Most of the time these clouds create even and soft lighting, unlike the harsh sun rays you had the week before. Therefore they act like natures light defusing box which can create very moody scenes, especially in your local woodland.
If you find the weather starts to improve you may find the clouds start to break apart, creating pools of light where the sun has broken out through the clouds. This may only last a few minutes so be quick and photograph these bursts of light before the clouds close in again.
7. Morning, Midday or Evening?
To capture the best images, landscape photographers are constantly faced with the problem of knowing when the best time of day is for landscape photography. It’s a fact that summer months offer longer days to photograph which unfortunately can mean if you want to photograph sun rises you’ll need to wake up early!
Use online tools like Google Earth and Photopills which will help you find the right terrain and where the magic hours are for the sun.
In the morning you want to make sure you arrive early to capture the morning mist lying over the hills, this usually starts before the sun even rises so make sure you are prepared to wake up extremely early. There is a chance you’ll wake up and find a clear sky, this will mean the sunlight will be very strong as it rises.
Therefore, you will not have a great deal of time before the sun becomes too harsh. If this happens I’d recommend you photograph using the rule of thirds and having the horizon on the top line. This means the foreground will take up two-thirds of the image and the clear sky will take up only a third.
When you imagine a summer scene you picture the image being taken during the day, where the bright sun is much higher in the sky, creating harsh light which can make your landscape image look very flat. Around midday you will likely find a haze appearing over the scene, this can reduce the color intensity in your scene and make your lens seem dirty.
The way photographers counteract this, as I explained earlier, is by using a polarizing filter which will defuse the haze and increase the contrast in your scene. In addition, using a wide angle lens can be very useful during the day. The wide scene of blue skies and sunlight shining through the clouds can be very effective in showing how quickly the weather can change in the summer.

During the evenings the best light normally starts to appear at around 5:00 pm, so you’ll need an early tea! The sunlight will be in the opposite direction to the sunrise you had earlier, so pre-planning your location is a must as you don’t want to find the sun setting in the wrong place. Personally, the evenings are my favorite time to take photos as I feel it has the best light.
To summarise, if you want to photograph a summer sunrise you’ll need to get there early at around 6 am other wise the sun will be too harsh. During the day you’ll need to keep in mind the sun creates harsh shadows, so maybe capture the wider scene and in the evenings arrive there at around 5 pm and stay out late. The best light might appear once the sun has set!
8. Editing
Chances are you’ll now have hundreds of summer photographs to play with, meaning during the days when you can’t take photos you can experiment with the editing process.
If you’ve become fed up with taking bright blue landscapes, why not edit them into black and white photographs. Turning a scene into black and white can make an image appear more dark and moody.
In addition, during the evening you might find yourself in a location with high amounts of contrast between the sky and the ground. You may be able to combat this if you shoot in RAW then edit it afterward. However, I personally use HDR photography.
To conclude, landscape photography in the summer months can be hard but if you have a creative spark you can be rewarded with stunning images from creating silhouettes to taking advantage of lens flare.
Equipment is also an important tool in summer landscape photography as tripods and polarized filters can help enhance your images and improve the overall contrast in the scene.
Lastly, and most importantly, you need to be prepared. Don’t be afraid to find new locations, research online where other local photographers have been and make a lot of notes on what camera angles they have used.
In addition, choosing the right time of day is crucial to capturing stunning summer landscapes, too late in the morning and you might find the light too harsh. Too early in the evening and you might be waiting for hours for the perfect light to appear.
Thank you for reading this article, if you have any other ideas please leave a comment down below and I’ll add them to the list!
If you’re studying photography I highly recommend you check our worksheets on Photography Analysis!

Included in these worksheets are, 3 pages of Photography Keywords and Terms, The Photography Analysis Worksheet and examples of my own analysis work!
Thanks again and if you enjoyed reading it please share and even pin it to your Pinterest wall!
Some of these links are affiliates which means I make a small percentage if you use my link.
Comments are closed.